

How to trim video using Windows 10's Photos app
If you recorded a video using your telephone or digital camera, and y'all concluded up with a very long video, or you want to crop off unwanted footage, you lot don't demand to spend coin or install complicated tertiary-party tools.
The Windows 10 Photos app includes a powerful video editor that allows yous to trim 1 or multiple parts of a video quiet easily.
In this Windows 10 guide, we'll walk you lot through the steps to trim videos using the Photos app.
- How to trim a video using Photos app
- How to trim multiple parts of a video using Photos
How to trim a video using Photos app
To trim a video using Photos on Windows 10, use these steps:
- Open Photos.
- Click the video you want to edit.
-
Click the Edit & Create button from the tiptop-correct corner, and select the Trim option.
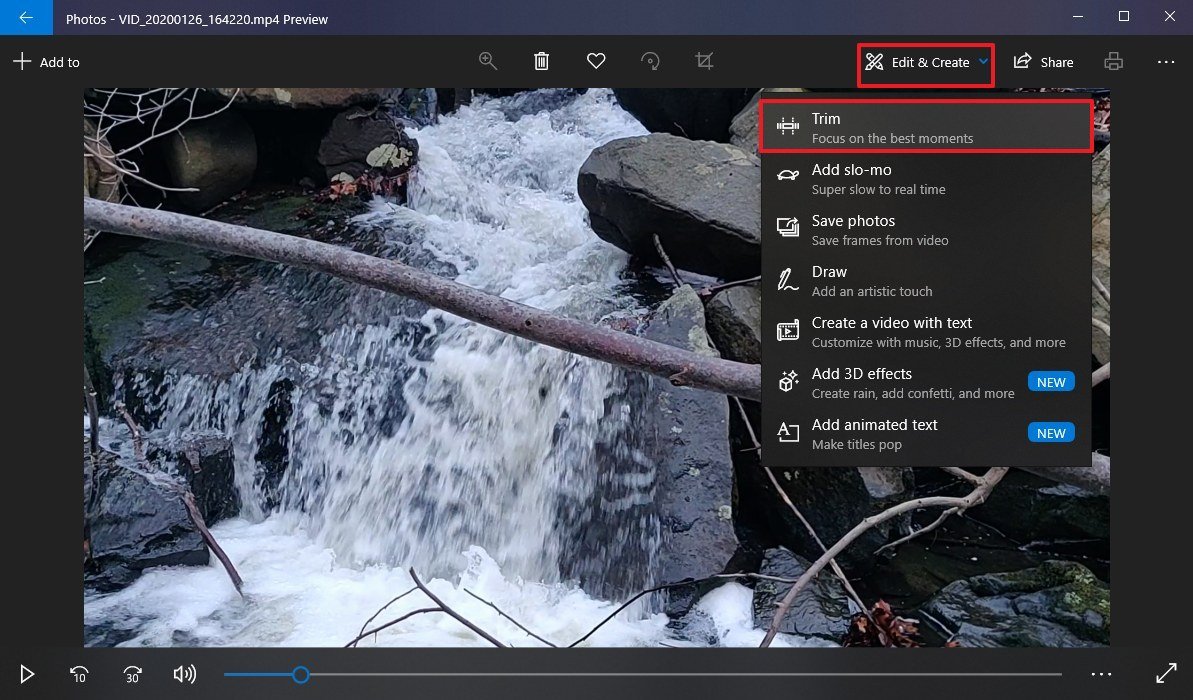 Source: Windows Primal
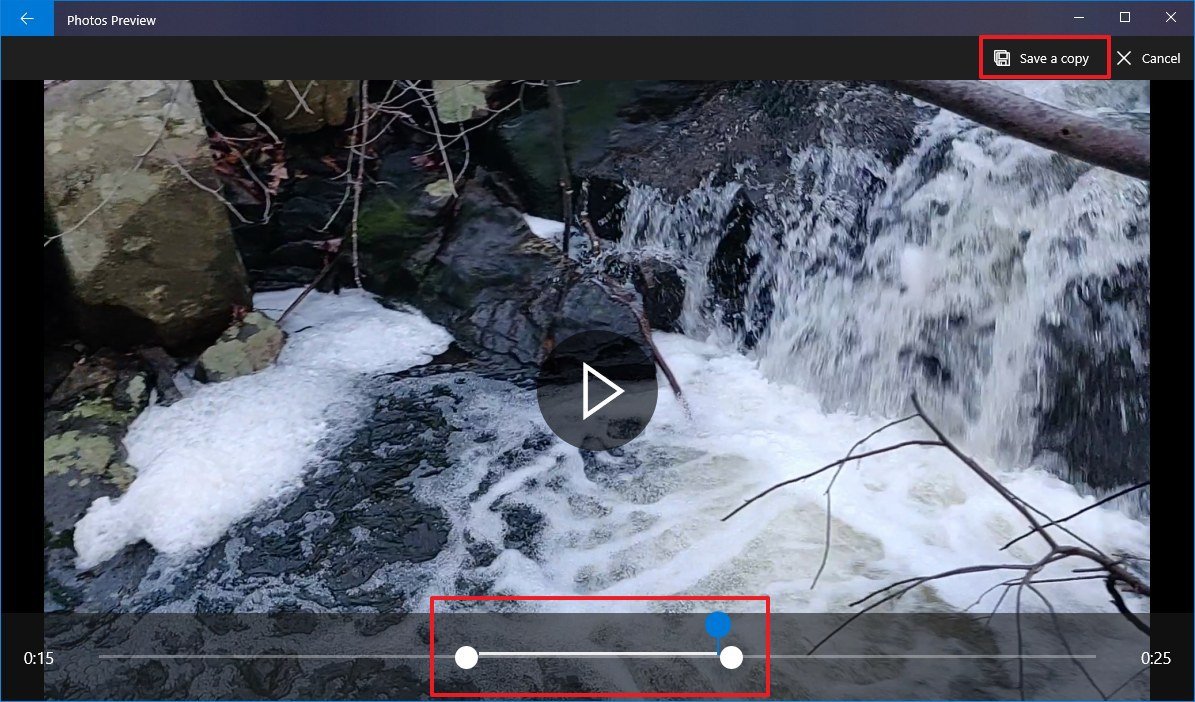
 - Apply the white (right and left) pins to select the role of the video you desire to trim.
-
Utilise the blue pin to scrub the footage to make sure you lot're trimming the correct section.
 Source: Windows Central
 - Click the Save a copy push from the summit-right corner.


Once you complete the steps, the Photos app volition process the video, and you'll end up with a trimmed version of the file with only the part you want to proceed. Yet, the feature will not edit the original video. Instead, information technology'll create a new file with the new footage.
If you're trying to save some space, later completing the trimming process and making sure the video is the style you want it, remember to delete the original video from the Photos "Collections" tab.
How to trim multiple parts of a video using Photos
Although the trimming option doesn't let y'all to edit multiple parts of the video, you can use the video editing tool to reach this task.
To trim multiple parts of a video, utilize these steps:
- Open up Photos.
-
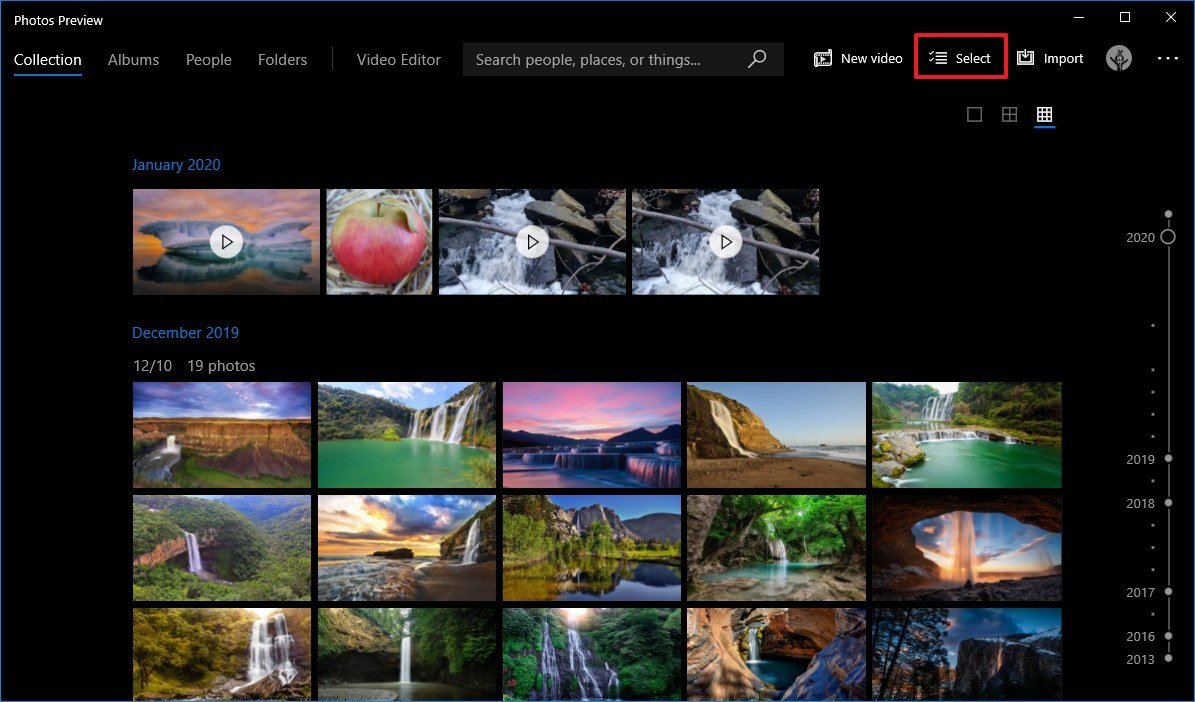
Click the Select button from the superlative-right corner.
 Source: Windows Central
 - Check the video you want to edit.
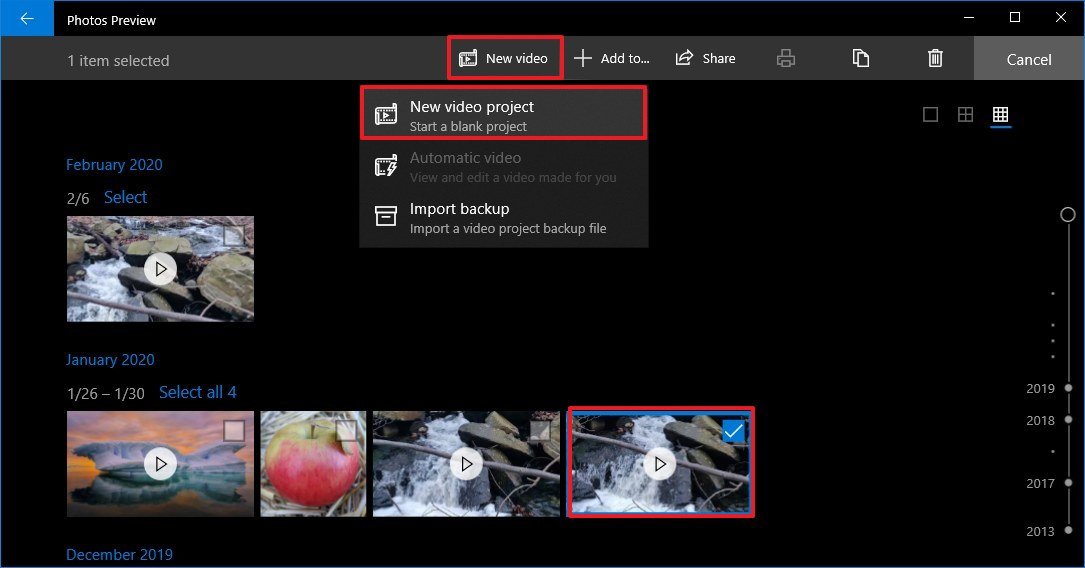
- Click the New video push from the toolbar.
-
Select the New video project option.
 Source: Windows Central
 - Specify a name for the projection.
-
Click the OK button.
 Source: Windows Central
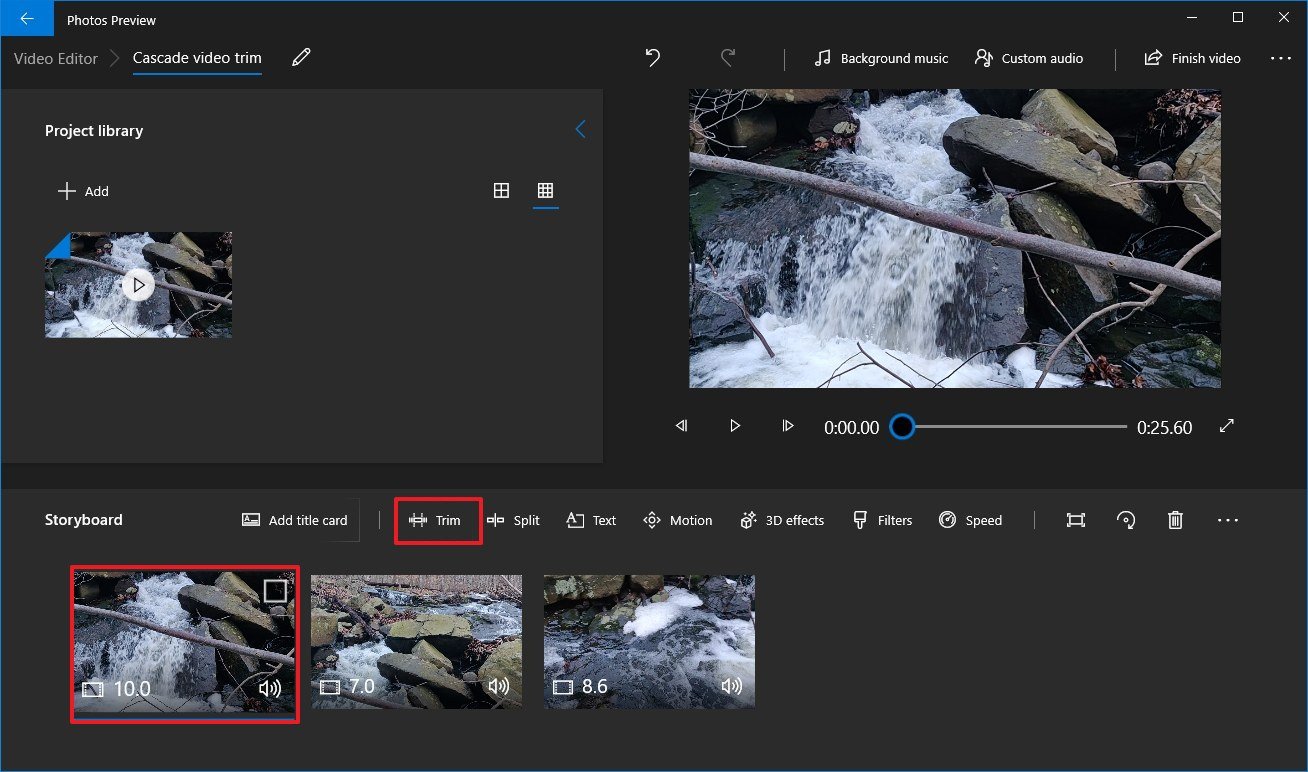
 - Select the video clip from the Storyboard.
-
Click the Split push from the toolbar.
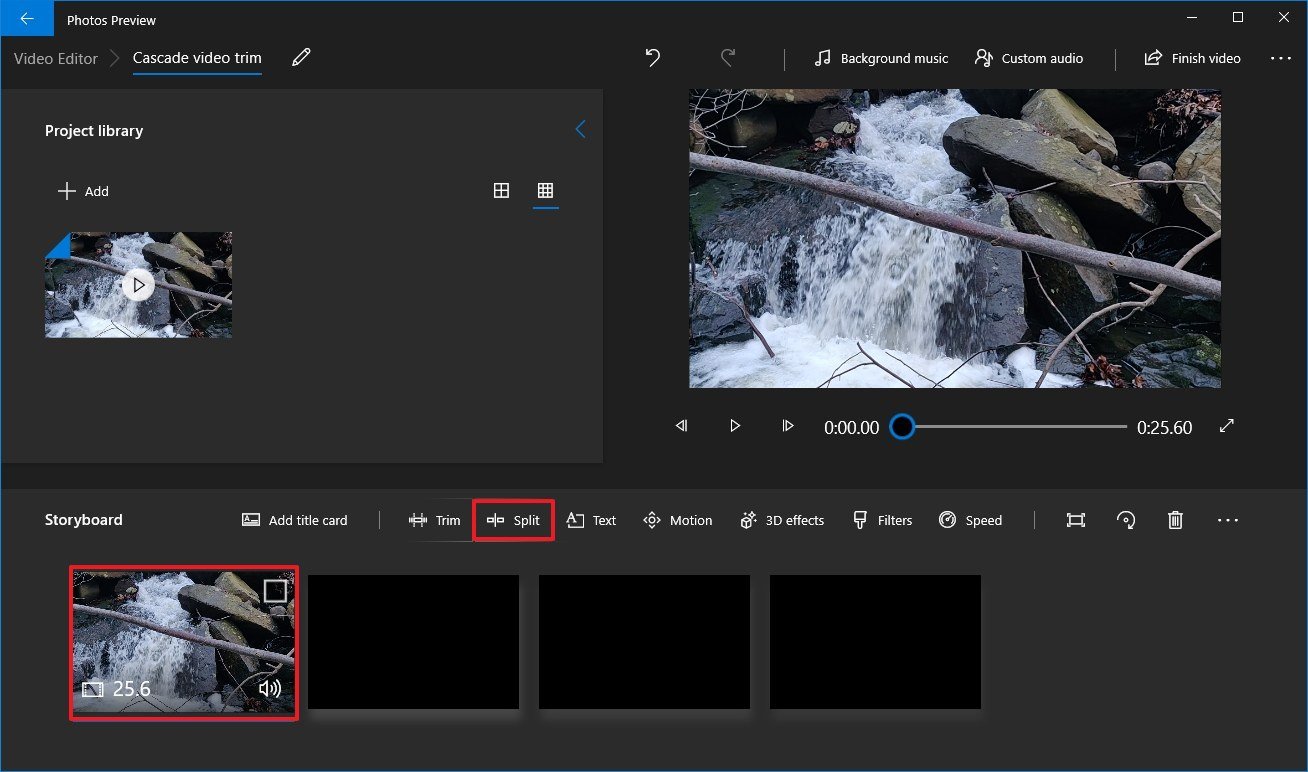 Source: Windows Fundamental
 -
Select the department that includes the first part of the video yous want to trim.
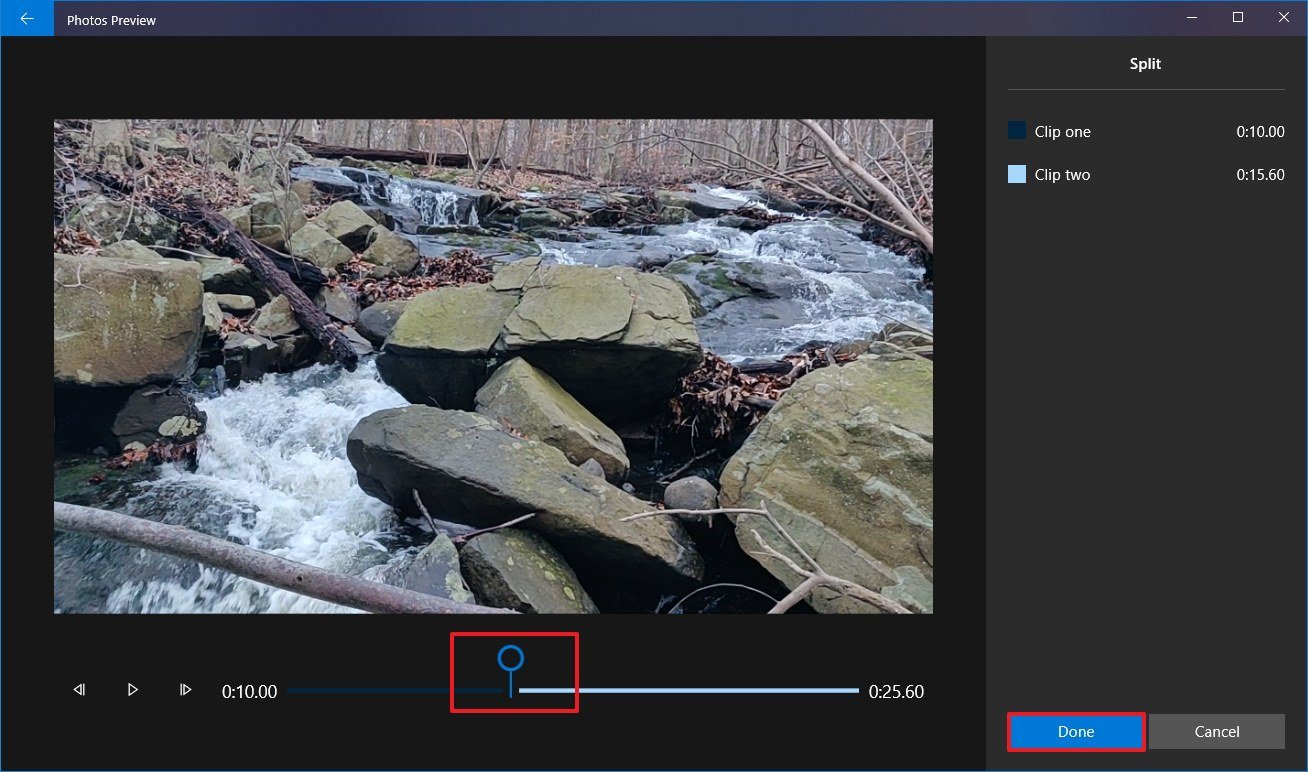 Source: Windows Primal
 - Click the Done push button.
- Select the remaining part of the video. (Usually, the ane on the right side.)
-
Click the Split push button once again.
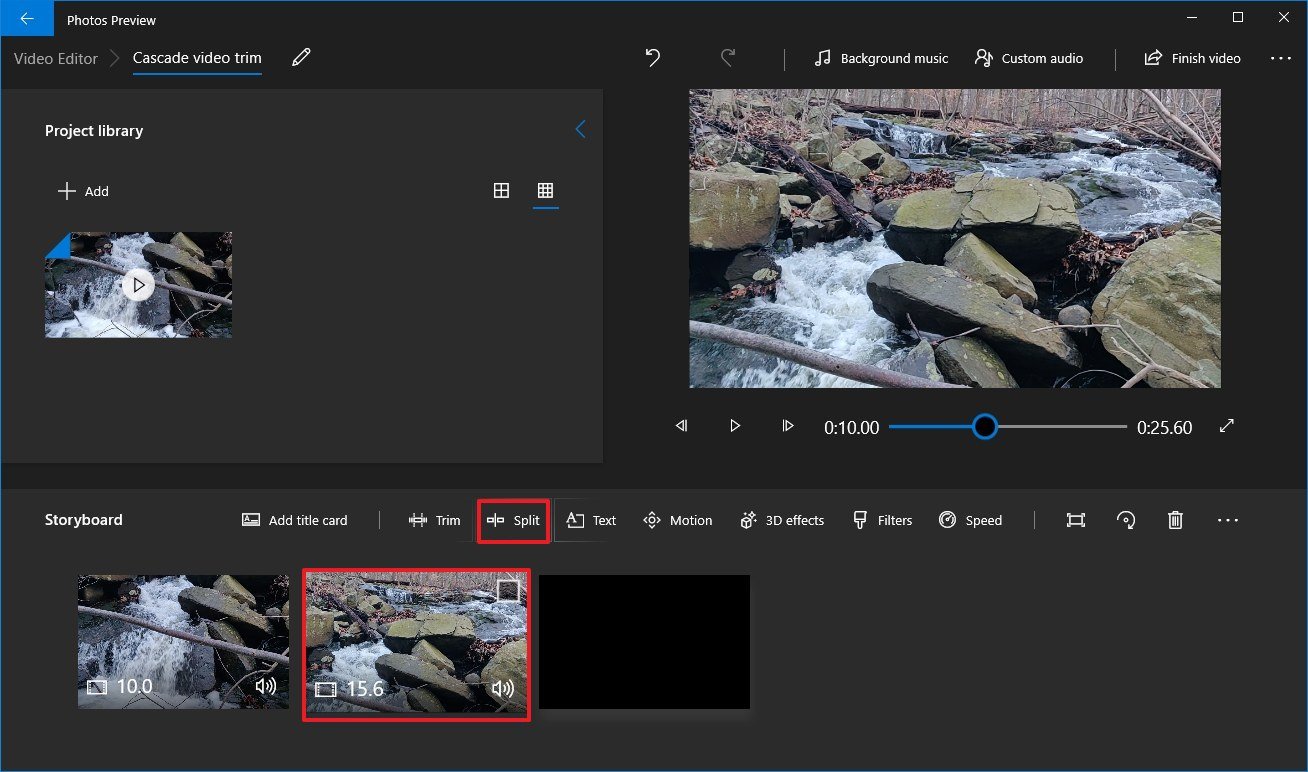 Source: Windows Central
 -
Select the section that includes the second part of the video you want to trim.
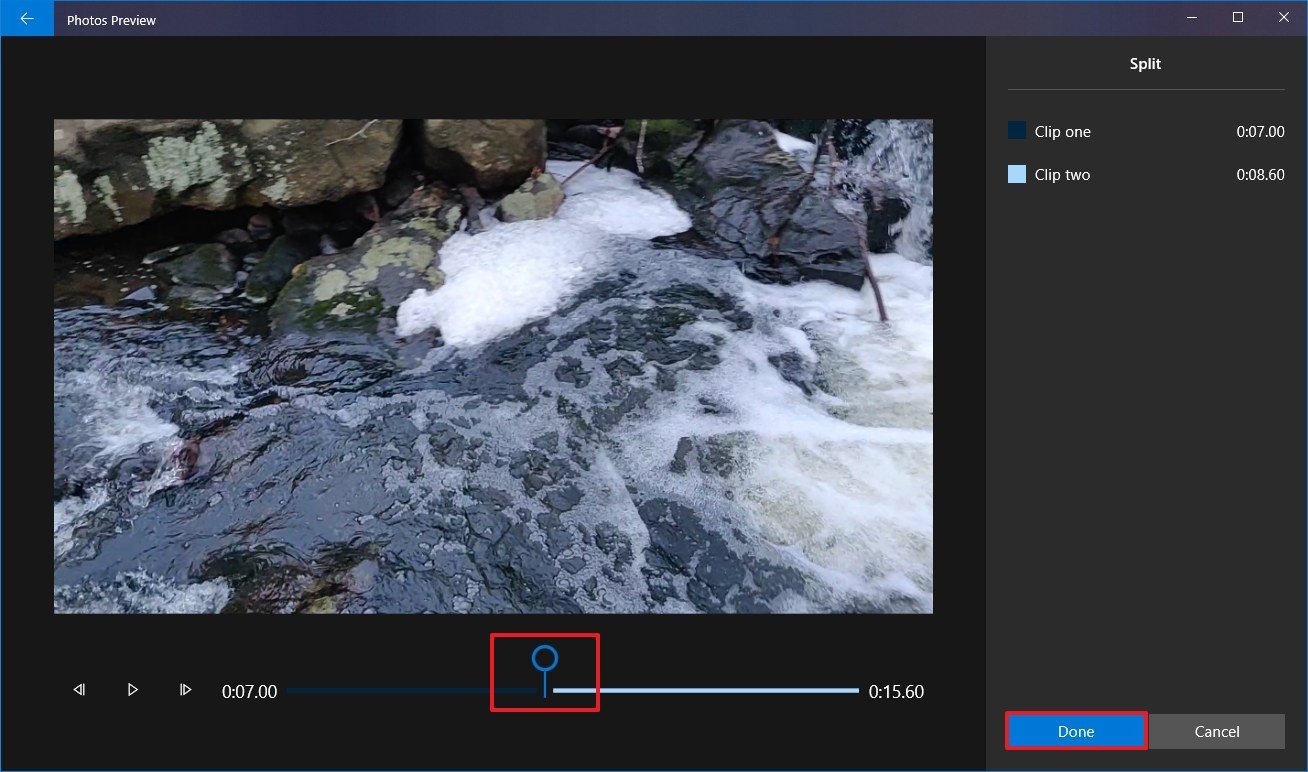 Source: Windows Central
 - Click the Done button.
- Echo steps No. 12 through 15 to partition the entire video.
- Select the commencement carve up clip from the Storyboard.
-
Click the Trim push button from the toolbar.
 Source: Windows Key
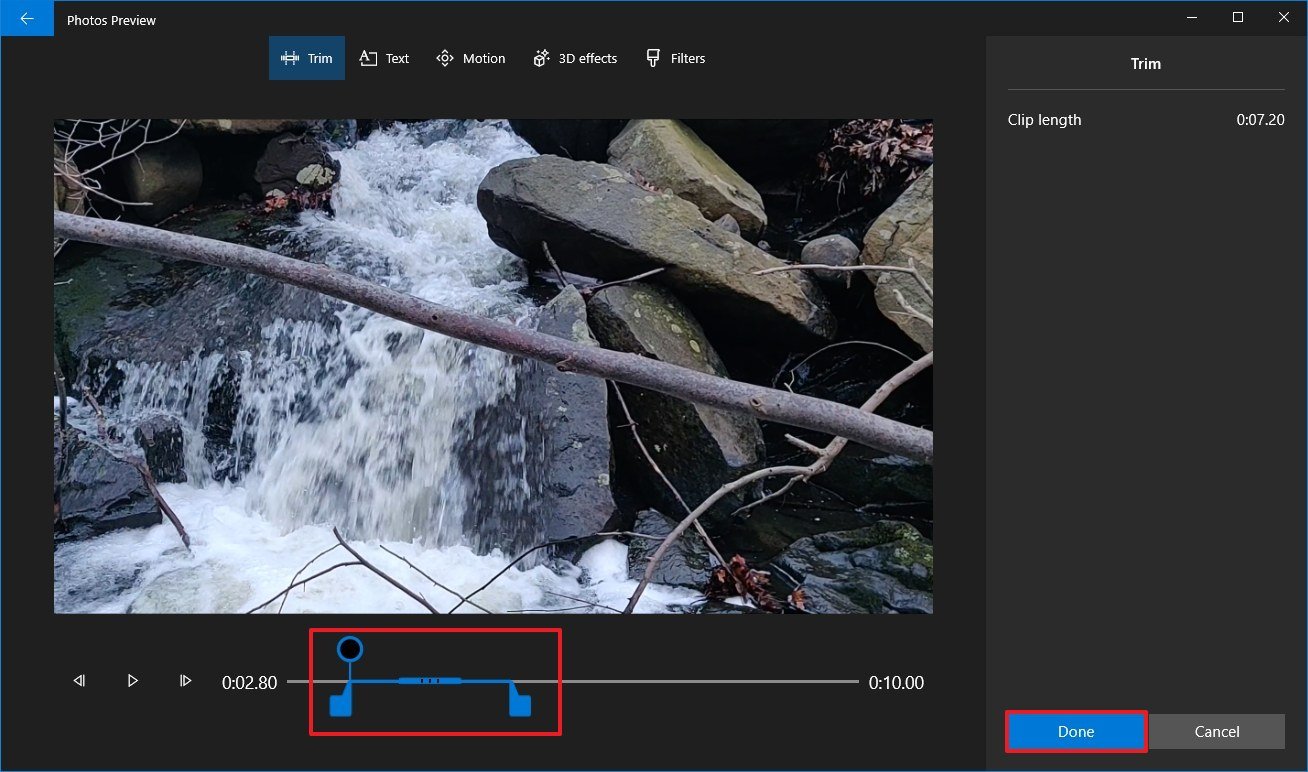
 -
Utilise the bluish pins to adjust the section of the video to trim.
 Source: Windows Central
 Quick tip: While trimming the video, brand sure only to move the pins inward, as if you motility the right pin outwards, y'all could end modifying the previous split up settings for the clip.
- Click the Play button to preview the clip.
- Click the Done button.
- Echo steps No. 17 through 21 to trim the remaining clips.
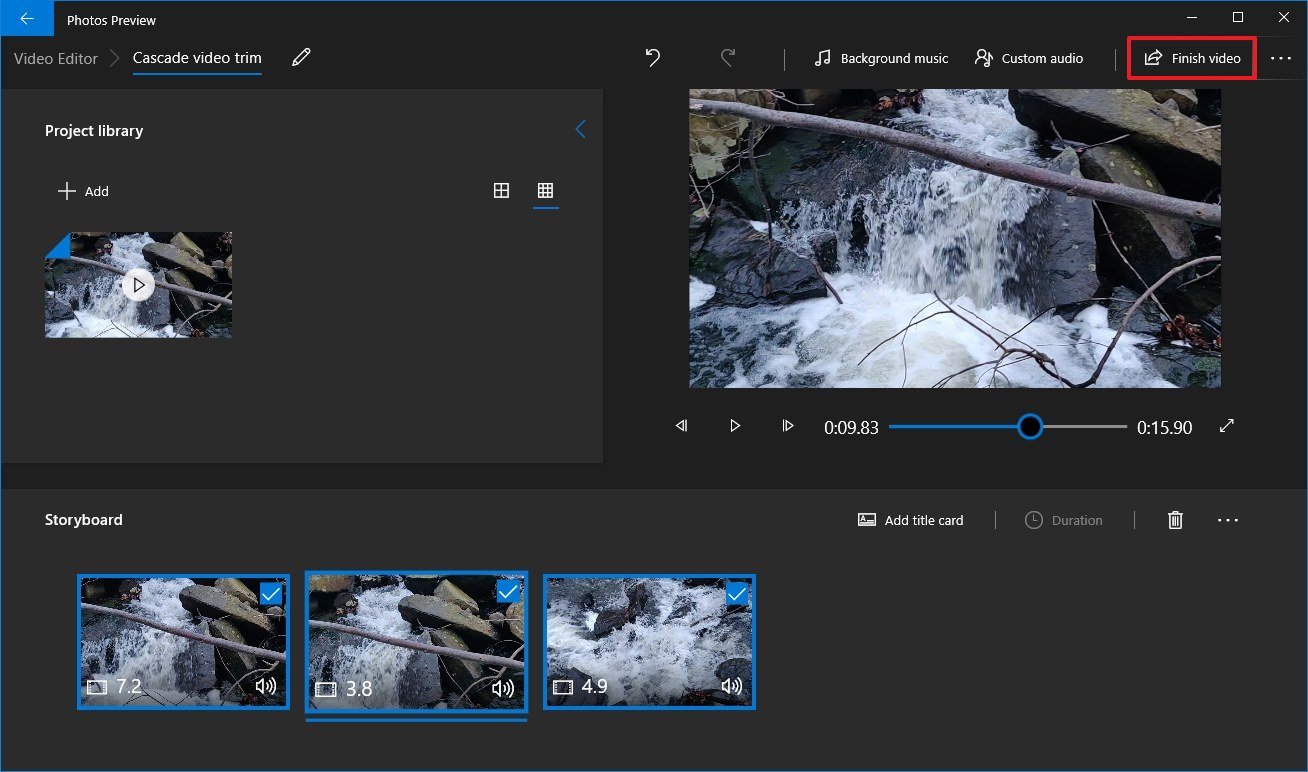
- Click the Play push from the preview section.
-
Click the Terminate video button from the peak-correct corner.
 Source: Windows Central
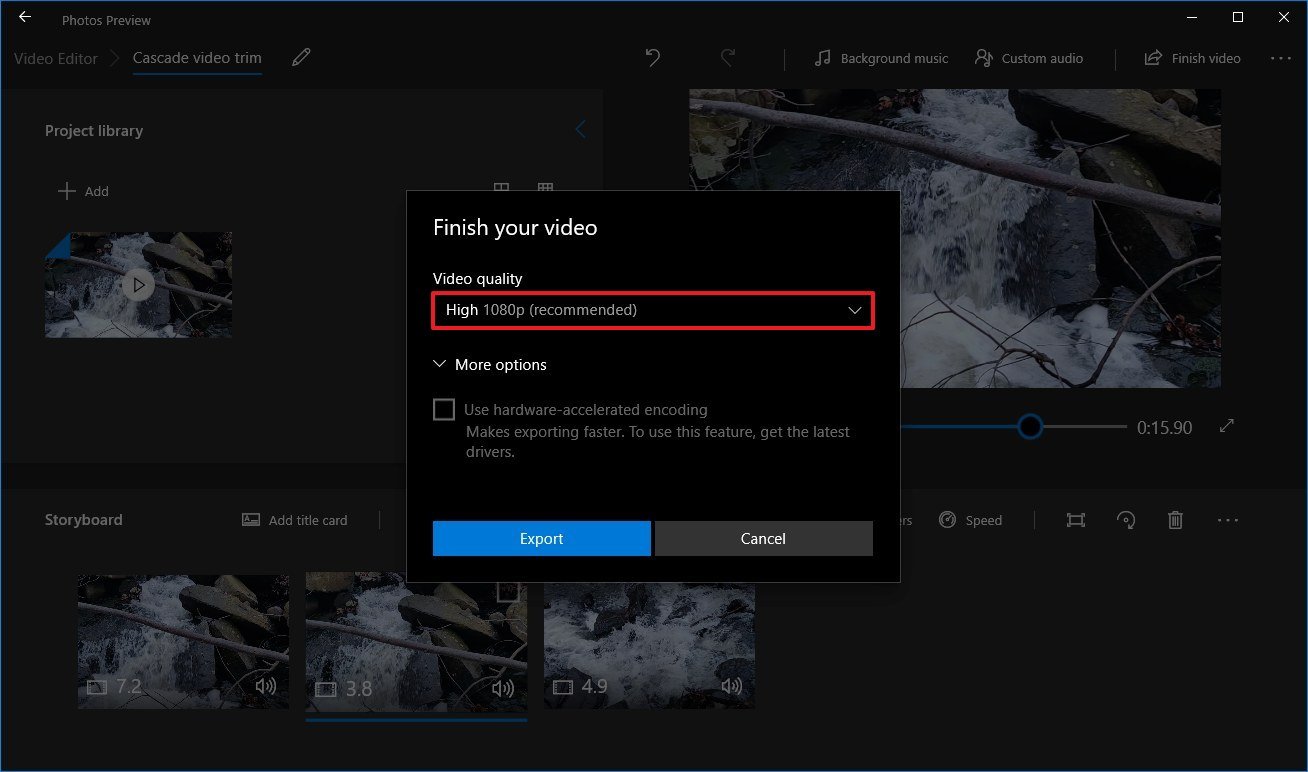
 - Apply the "Video quality" drop-downwardly menu and select the quality of the video. For example, Loftier 1080p (recommended).
- Under the "Motion options" section, check the Utilise hardware-accelerated encoding selection (if bachelor).
-
Click the Export push button.
 Source: Windows Primal
 - Select the destination folder. For instance, Pictures binder.
- Click the Export push.


After you complete the steps, the Photos app will process the project, and information technology'll create a new video only with the parts you lot trimmed.
We're focusing this guide on the steps to trim a video, only the Photos app offers a lot of features for creating a video project. You can learn more using our comprehensive guide with everything you lot demand to know to use the video editing tool included with Photos.
More Windows x resources
For more than helpful articles, coverage, and answers to mutual questions virtually Windows ten, visit the following resources:
- Windows ten on Windows Central – All you need to know
- Windows 10 assistance, tips, and tricks
- Windows 10 forums on Windows Fundamental

UH OH
An internet connectedness will soon be required when setting upwards Windows eleven Pro
Microsoft has announced that later this year, users volition be required to connect to the internet and sign-in with a Microsoft Account during the out of box setup experience on Windows 11 Pro. Microsoft has already been enforcing this requirement on Windows xi Home since launch last October, and Windows 11 Pro is now expected to follow suit soon.

Source: https://www.windowscentral.com/how-trim-video-using-photos-windows-10
Posted by: jamesexther.blogspot.com
0 Response to "How to trim video using Windows 10's Photos app"
Post a Comment